3. Physical Mode
To run GIS.lab in physical mode, there are some hardware and software requirements. As well as using virtual mode, GIS.lab source code is needed. Information about requirements can be found below together with graphical figuration, see Fig. 3.1.
Hardware
GIS.lab Unit machine
Intel NUC
at least 8GB RAM
at least 70GB SSD
at least 4 GB RAM on host machine
networking accessories
1 Gb Ethernet switch
ethernet cables
Software
host machine running Linux or MAC OSX
Git, see Git installation
Ansible 2.4 or higher, see Ansible installation

Fig. 3.1 Requirements for installation in physical mode.
See also
 Intel documentation
and Intel documentation for NUC hardware.
Intel documentation
and Intel documentation for NUC hardware.
Important
 In following procedure it is assumed that GIS.lab unit
machine is going to be installed in network with automatic IP address
assigning from DHCP server.
In following procedure it is assumed that GIS.lab unit
machine is going to be installed in network with automatic IP address
assigning from DHCP server.
3.1. Master
The process of installation consists of three main steps:
Adjusted operating system installation
Following steps will guide user to install basic Ubuntu operating system on GIS.lab unit machine. Network is configured to automatically obtain IP address from DHCP server.
In the first step download 64-bit PC (AMD64) Server Install ISO image: ubuntu-18.04.5-server-amd64.iso
Furthermore, it is important to create SSH keypair. Generated
public part of keypair will be used as a way to identify trusted
computers without involving passwords. It can be generated on host
machine with ssh-keygen command. By default, the keypair will be
saved in $HOME/.ssh directory. It is recommended to rename new key
suitably, for example id_rsa_gislab_unit.
Then use script providers/gislab-unit/gislab-unit-iso.sh from
GIS.lab source code directory to create custom
GIS.lab unit installation ISO image file from original Ubuntu
server ISO image file downloaded in above step. Adjusted image will be
used for automatic installation of basic Ubuntu operating system on
GIS.lab unit machine.
Tip
 Run
Run ./providers/gislab-unit/gislab-unit-iso.sh -h
command to see details of required options. Options are written below.
USAGE: gislab-unit-iso.sh [OPTIONS]
Create GIS.lab base system installation ISO image from Ubuntu Server ISO.
Script must be executed with superuser privileges.

OPTIONS
 -s country code used for choosing closest repository mirror (e.g. SK)
 -t timezone (e.g. Europe/Bratislava)
 -d disk size in GB (valid options: 60, 120, 240, 480; default: 60)
 -a swap size in GB (default: 4)
 -k SSH public key file, which will be used for GIS.lab installation or update
 -w working directory with enough disk space (2.5 x larger than ISO image size)
 -i Ubuntu Server installation ISO image file
 -h display this help
Important
gislab-unit-iso.sh depends on pwgen utility. You have to
install the pwgen package before running the command.
For example, assuming that downloaded original Ubuntu server
installation ISO image is located in Downloads directory, user
wants to use Italian official Ubuntu archive mirror, Rome
timezone, SSH public key file particularly created for GIS.lab
installation is located in .ssh directory, disk size is set up
to 480GB (the smallest supported disk size is defined by
70GB). New adjusted image will be saved in tmp directory, then
the script can be run as follows.
sudo ./providers/gislab-unit/gislab-unit-iso.sh -s IT -t Europe/Rome \
-k ~/.ssh/id_rsa_gislab_unit.pub -w /tmp -d 480 \
-i ~/Downloads/ubuntu-18.04.5-server-amd64.iso
Note
The gislab-unit-iso.sh script must be run with superuser
(sudo) privileges.

Fig. 3.2 Creation of custom GIS.lab unit installation ISO image.
Continue with preparation of bootable installation USB stick from
custom GIS.lab Unit ISO image file created in previous step. On Ubuntu
Startup Disk Creator or UNetbootin applications can be used.
Recommended procedure is based of dd command. See example
bellow.
sudo mkdosfs -n 'GIS.lab Base System' -I /dev/sdf -F 32
isohybrid /path/to/your/gislab.iso
sudo dd if=/path/to/your/gislab.iso of=/dev/sdf bs=4M conv=fdatasync
Important
In example above is assumed that USB stick has been connected
to host machine as /dev/sdf device. Your configuration can be
different, please check connected devices by dmesg command!
Note that formatting can be also done by gparted GUI
application. For isohybrid command syslinux or
syslinux-utils package must be installed.
When above process is done, together with ready USB stick attach also
power supply, HDMI display, keyboard and Ethernet cable into GIS.lab
unit machine, see Fig. 3.3. Power it on, press
F10 key to run boot manager and select Boot from USB
option. Then fully automatic installation should start. When finished,
machine will be turned off. USB stick should then be removed.

Fig. 3.3 Necessary hardware components in adjusted operating system installation process.
Note
 In installation process there is only one
notification related to cached packages that allows to use Apt
Cache server. Otherwise just
In installation process there is only one
notification related to cached packages that allows to use Apt
Cache server. Otherwise just Continue option should be
selected.
As a next step, power on GIS.lab unit. In the case that monitor and
keyboard is connected to the unit it is possible to log in to machine
using username ubuntu and password ubuntu. It is also possible
to log in to unit from host machine using SSH. That is why SSH key
was generated.
Important
GIS.lab unit has to be registered in the
network. In other words IP address has to be assigned to
unit. Run ip a command on the unit to detect this address.
In case unit is not registered automatically, run DHCP client that
apply for IP address. Then verify working internet connection,
e.g. with ping command.
sudo dhclient eth0 -v
ping 8.8.8.8
Tip
To restart network use sudo /etc/init.d/networking restart
command.
To log in on GIS.lab unit machine via SSH enter on host machine ssh
ubuntu@<ip addr>
Note
Instead of IP address also assigned name of
registered unit should work, for example
gislab.intra.ismaa.it. This name can be found in output of
nslookup <ip address> command.
$ ssh gislab@server.intra.ismaa.it -i ~/.ssh/id_rsa_gislab_unit.pub
GIS.lab unit initialization
With regards to the recommended initialization, there are two
important Ansible files, <name-of-gislab-unit>.inventory file and
configuration file in host_vars directory which has already
been stated in configuration section of
this documentation.
Let’s create Ansible inventory file. The name depends on unit’s name
which is the same as customization file in host_vars
directory. The inventory file contains information about:
name of GIS.lab unit
IP address or hostname of unit
the name of provisioning user able to log in to GIS.lab unit (always keep
ubuntu)
<name-of-gislab-unit> ansible_ssh_host=<host-url> ansible_ssh_user=<provisioning-user-account-name>
Content of Ansible inventory file called gislab-unit-fem.inventory
could be as follows.
gislab-unit-fem ansible_ssh_host=10.234.1.44 ansible_ssh_user=ubuntu
In the next phase provisioning will be performed by
ansible-playbook commands. For more detailed information about
playbooks, see Ansible playbooks manual page.
Example with above mentioned names and files is below.

Fig. 3.4 Placement of important file for initialization in GIS.lab source code layout.
The initialization of GIS.lab unit will be performed by following command run from host machine:
ansible-playbook --inventory=gislab-unit-fem.inventory --private-key=~/.ssh/id_rsa_gislab_unit providers/gislab-unit/gislab-unit.yml
Important
It’s important to use private SSH key from the
same keypair as used when creating customized ISO image for
unit installation. In example above is assumed that the
command is run from GIS.lab source code directory where is
also placed previously created inventory file.
GIS.lab unit will reboot when finished.
Tip
See gislab-unit.yml contect to be well aware of what this
script is exactly performing.
Note
The initialization process depends on
platform. Currently GIS.lab supports also AWS, see providers
directory.
GIS.lab unit installation
Once GIS.lab is configured, installation can be performed. Run
following command to execute another ansible-playbook. In this
step all the work is made by gislab.yml file located in
system directory.

Fig. 3.5 Placement of important file for installation in GIS.lab file layout.
$ ansible-playbook --inventory=gislab-unit-fem.inventory --private-key=~/.ssh/id_rsa_gislab_unit system/gislab.yml
Now, GIS.lab unit machine is installed with GIS.lab system. Do not
forget to create user accounts by
gislab-adduser command and allow client machines to connect by running gislab-machines
command.
3.2. Client
GIS.lab machines are initialized from GIS.lab network using PXE or HTTP. This means always clean system, maintenance free with no HDD required using full hardware potential what make it opposite to thin client.
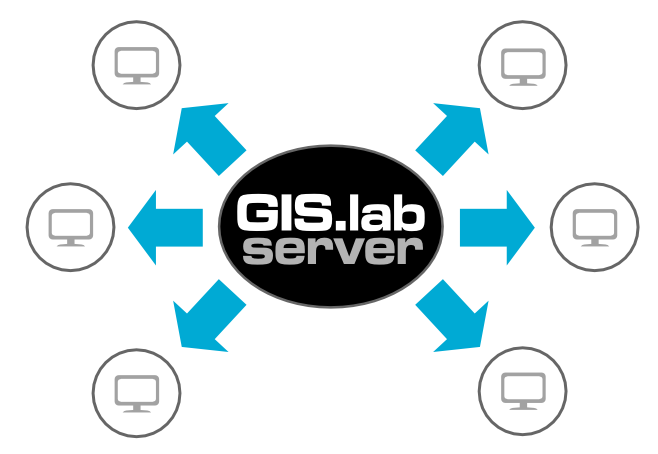
Fig. 3.6 GIS.lab machines launching.
Physical client mode is preferred way of launching GIS.lab client, because it provides best performance. It will run GIS.lab client session on client machine instead of original operating system installed (if any) on hard drive. Original operating system and local data will stay untouched and will be ready to run again after GIS.lab client is shut down.
To run physical client, it is required to connect machine running GIS.lab server and client machines via Gigabit switch and cables, CAT 5e or higher.
There is no reason to be afraid of loosing domestic operating system. GIS.lab client is capable to run even if you have Windows, Linux or MAC OSX installed on cliet machine.
Complete process of running GIS.lab client using physical mode, i.e. GIS.lab unit consists of three main steps.
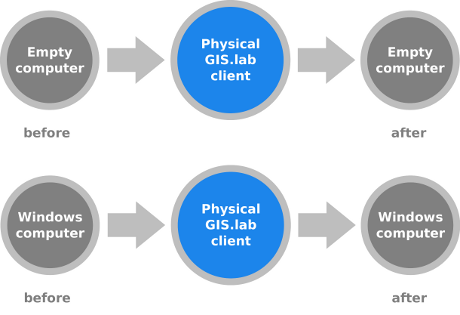
Fig. 3.7 Any computer can be GIS.lab client.
Booting
As well as in virtual mode it is possible to boot using using PXE or HTTP boot.
Important
Client machine must be enabled on master, see
Enabling GIS.lab client section for details.
3.2.1. PXE boot
PXE is a method of having a client boot using only its network card. Using this method of booting it is possible to circumvent the normal boot procedure, what means booting from CD/DVD/CD-RW Drive to Network Interface Card, usually known as NIC.
PXE boot is a default boot mode for GIS.lab clients. Booting from PXE requires to instruct client machine to boot from other device as it is usually doing so. On newer computers it is also required to disable Secure boot and/or enable Legacy mode.
Important
It is necessary to enabling NIC in BIOS.
The way how to enabling NIC is going into BIOS and look for it. It
depends on machine. BIOS boot order can be changed for one time using
F9 or F12 key, for permanent setup from BIOS configuration
using DEL, F2 or F12, but it can differ from one to
another machine brand.
It is recommended to look for Preferal devices, System Configuration, Integrated Devices or something similar and find NIC card there. When it is found, enabled and then back out, save and reboot should be selected.
In general, there are multiple possibilities how to instruct client machine to boot from PXE. See potential instructions below.
Depending on vendor, pressing some
Fat machine start will temporary instruct machine to boot from PXE.Depending on vendor, pressing some
Fkey at machine starts to launch boot manager and enables to choosePXEorPCI LANin boot menu to boot from PXE.PXEorLANoption set as first boot device in BIOS configuration enable to boot from PXE after machine restart.
See also
See procedure of enabling PXE boot for
Lenovo or Dell machine in
GIS.lab in practice section.
For more information about how it works see for example PXE Boot Server Installation Steps in Ubuntu Server VM.
3.2.2. HTTP boot
In addition to default PXE boot method, GIS.lab clients can boot over HTTP, which can provide some advantages.
To enable HTTP boot, it is needed to create bootable USB stick
from special ISO image which exists in http-boot directory.
Recipe is as follows.
Insert free USB stick into Linux workstation machine. If it is
automatically mounted, unmount it. Run dmesg command to detect
device assigned to USB stick by operating system.
Note
It should be something like /dev/sd[x].
Burn GIS.lab Desktop bootloader into USB stick with command below. Be careful to choose correct output device without a partition number.
$ sudo dd if=http-boot/gislab-bootloader.iso of=/dev/sd[x]
Insert prepared USB stick into client machine and instruct it to boot from it.
Running physical GIS.lab client
After successful booting, there will be welcome screen with login dialog, see figure Fig. 3.8. Creation of user accounts and running GIS.lab clients are the same as in virtual mode. Find more details in User accounts and Running virtual GIS.lab client sections.
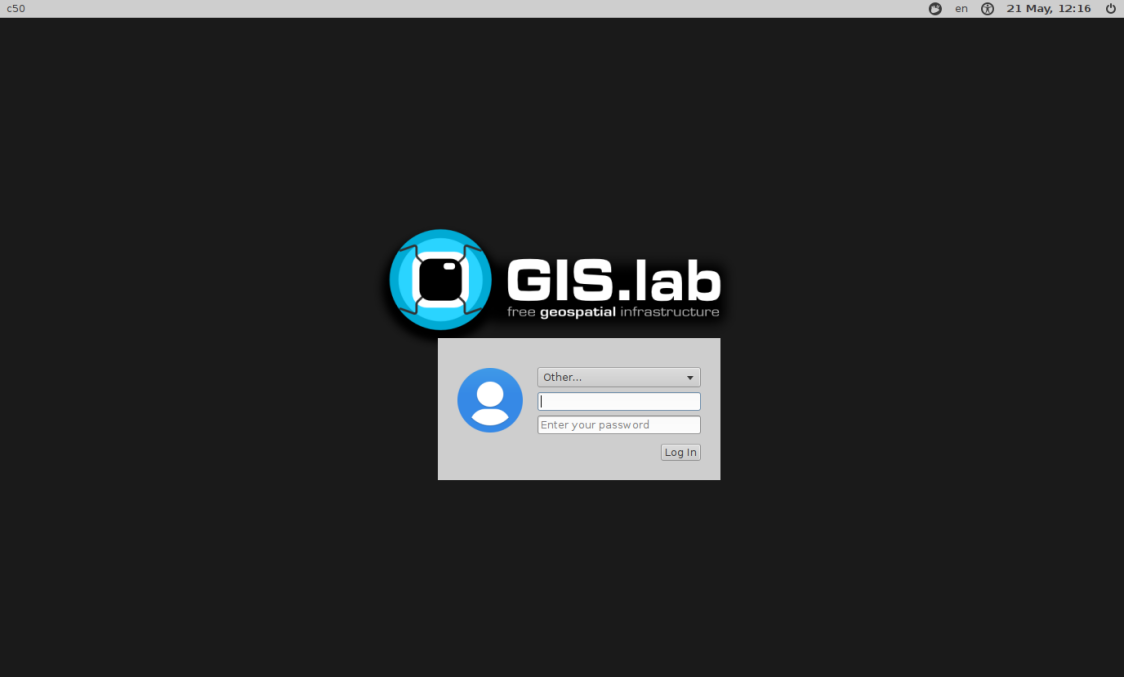
Fig. 3.8 GIS.lab client logging in.
Enjoy!

Fig. 3.9 GIS.lab client running environment.
3.3. How to upgrade GIS.lab Desktop?
GIS.lab upgrade procedure consists from three steps described in virtual mode section. Only difference is command used for upgrade, Ansible is used instead of Vagrant.
GIS.lab source code update:
$ git pull
Upgrade with Ansible:
$ ansible-playbook --inventory=gislab-unit.inventory --private-key=<private-SSH-key-file> system/gislab.yml